when click on Button or TextView or may be layout, when click then change background color. purpose of this, user can detect click or not on button.
when press button then color should be changed.
Thursday, December 3, 2015
Save Value in SharedPreferences
Save Value in SharedPreferences
In Android Save Value in key pair format we use SharedPreferences.
SharedPreferences myPrefs = getSharedPreferences("TAG", MODE_PRIVATE);
SharedPreferences.Editor myEditor = myPrefs.edit();
SharedPreferences.Editor myEditor = myPrefs.edit();
save value
myEditor.putString("name", abc); // key pair
myEditor.commit();
myEditor.commit();
Save Boolean Value
myEditor.putBoolean("key", abc); // key pair
myEditor.commit();
Get Boolean Value

boolean status= myEditor.getBoolean(key, false);
Get Save value
String name = myPrefs.getString("name", "");
Wednesday, December 2, 2015
JSON Parsing in Android
Parse data from server is many type like XML,DOM and JSON but JSON Parsing widely used, this topic we discuss JSON PARSING.
How to Parse JSON Object:
first we get data from server afterthat we parse, in JSON start with Object or Array.
{ } = Object
[ ] = Array
so we check data is object or array.
String result= {"response":"100","data" : "Sucess"}
It is start with object so first object parse then string.
It is start with object so first object parse then string.
try {
    JSONObject json = new JSONObject(result);
String response= json.getString("response"); String data= json.getString("data"); } catch (JSONException e) {
e.printStackTrace();
}we get response = 100;and data= Sucess
Tuesday, December 1, 2015
Show Google Ads in Android(AdMob)
show advertising in android mobile like banner or full screen add.
First we need id for ads open https://apps.admob.com/ and monetise application . there are basically two type of ads .
First: Banner Ad (show banner at top or bottom)
Second Full Screen Ad(Interstitial Ads)
<?xml version="1.0" encoding="utf-8"?>
<RelativeLayout xmlns:android="http://schemas.android.com/apk/res/android"
xmlns:ads="http://schemas.android.com/apk/res-auto"
android:layout_width="fill_parent"
android:layout_height="fill_parent" >
<com.google.android.gms.ads.AdView
android:id="@+id/adMob"
android:layout_width="fill_parent"
android:layout_height="wrap_content"
android:layout_alignParentBottom="true"
android:layout_centerHorizontal="true"
ads:adSize="SMART_BANNER"
ads:adUnitId="YOUR BANNER ID" >
</com.google.android.gms.ads.AdView>
</RelativeLayout>
<uses-permission android:name="android.permission.INTERNET" />
AdRequest adRequestFull;
mInterstitialAd = new InterstitialAd(this);
mInterstitialAd.setAdUnitId("YOUR ID");
adRequestFull = new AdRequest.Builder() .addTestDevice(AdRequest.DEVICE_ID_EMULATOR) .build();
mInterstitialAd.loadAd(adRequestFull);
 |
| AdMob in Android |
First: Banner Ad (show banner at top or bottom)
Second Full Screen Ad(Interstitial Ads)
Banner Ad show
banner can be adjust according to app it may be top or bottom
add Google Play Library
AdView mAdView = (AdView) findViewById(R.id.adViewHOME);
AdRequest adRequest = new AdRequest.Builder().build();
mAdView.loadAd(adRequest);
AdMob XML File :
<RelativeLayout xmlns:android="http://schemas.android.com/apk/res/android"
xmlns:ads="http://schemas.android.com/apk/res-auto"
android:layout_width="fill_parent"
android:layout_height="fill_parent" >
<com.google.android.gms.ads.AdView
android:id="@+id/adMob"
android:layout_width="fill_parent"
android:layout_height="wrap_content"
android:layout_alignParentBottom="true"
android:layout_centerHorizontal="true"
ads:adSize="SMART_BANNER"
ads:adUnitId="YOUR BANNER ID" >
</com.google.android.gms.ads.AdView>
</RelativeLayout>
Manifest Permission
you must have set internet permission.<uses-permission android:name="android.permission.INTERNET" />
Full Screen Ads :
InterstitialAd mInterstitialAd;AdRequest adRequestFull;
mInterstitialAd = new InterstitialAd(this);
mInterstitialAd.setAdUnitId("YOUR ID");
adRequestFull = new AdRequest.Builder() .addTestDevice(AdRequest.DEVICE_ID_EMULATOR) .build();
mInterstitialAd.loadAd(adRequestFull);
Saturday, November 28, 2015
Open Right to Left Navigation Drawer Android
open right to left Navigation Drawer in android fragment activity. it is similar to left to right as we discuss http://invokecode.blogspot.com/2015/11/custom-navigation-drawer-in-android.html
but in this we need to change line.
but in this we need to change line.
?xml version="1.0" encoding="utf-8"?>
<RelativeLayout xmlns:android="http://schemas.android.com/apk/res/android"
xmlns:ads="http://schemas.android.com/apk/res-auto"
android:layout_width="fill_parent"
    android:layout_height="fill_parent">
    <android.support.v4.widget.DrawerLayout
android:id="@+id/drawer_layout"
android:layout_width="fill_parent"
       android:layout_height="match_parent">
        <FrameLayout
android:id="@+id/content_frame_Home"
android:layout_width="match_parent"
           android:layout_height="match_parent"/>
        <RelativeLayout
android:id="@+id/left_relative"
android:layout_width="300dp"
android:layout_height="wrap_content"
           android:layout_gravity="start">
            <include layout="@layout/slider" />
        </RelativeLayout>
    </android.support.v4.widget.DrawerLayout>
</RelativeLayout>
android:layout_gravity="start" change to android:layout_gravity="end"in Coding we need to change GRAVITY LEFT To Right..DrawerLayout drawerLayout; drawerLayout = (DrawerLayout) findViewById(R.id.drawer_layout); drawerLayout.openDrawer(Gravity.RIGHT);
Use Weight in Linear Layout Android
use weight for equal child of layout. margin and padding unable to set equal child because when multi screen support and margin and padding set fix, but in weight they remains same in all layout.
In Linear Layout need orientation horizontal and vertical.
In Linear Layout need orientation horizontal and vertical.
XML for Linear layout weight.
<LinearLayout
android:layout_width="fill_parent"
android:layout_height="wrap_content"
android:layout_marginTop="50dp"
android:layout_marginLeft="20dp"
android:layout_marginRight="20dp"
     android:orientation="horizontal">

    <TextView
android:layout_width="0dp"
android:layout_weight="1"
android:layout_height="wrap_content"
android:text="FIRST"
android:gravity="center"
android:textSize="20sp"
       android:textColor="#000000"/>

    <TextView
android:layout_width="0dp"
android:layout_weight="1"
android:layout_height="wrap_content"
android:text="SECOND"
android:gravity="center"
android:layout_marginLeft="20dp"
android:textSize="20sp"
     android:textColor="#000000"/>

</LinearLayout>
Monday, November 23, 2015
View Pager in android
View Pager-scroll page (slide) call view pager.
ViewPager pager;
private ArrayList<ModelClassPager> arrayOfPager;
pager1 = (ViewPager)findViewById(R.id.pager);
arrayOfPager = new ArrayList<ModelClass>();
arrayOfPager.add(new ModelClass(R.drawable.first));
arrayOfPager.add(new ModelClass(R.drawable.second));
arrayOfPager.add(new ModelClass(R.drawable.third));
arrayOfPager.add(new ModelClass(R.drawable.four));
PagerAdapter pagerAdapter = new PagerAdapter (MainActivity.this,arrayOfPager);
pagerAdapter .setAdapter(pagerAdapter);
PagerAdapter extends PagerAdapter {
LayoutInflater inflates;
ArrayList<ModelClass> arrayOfPager;
Context context;
public PagerAdapter (Context context,
ArrayList<ModelClass> arrayOfPager_) {
this.context = context;
this.arrayOfPager = arrayOfPager_;
inflates = (LayoutInflater) context
.getSystemService(Context.LAYOUT_INFLATER_SERVICE);
}
@Override
public int getCount() {
return arrayOfPager.size();
}
public Object instantiateItem(View collection, int position) {
ViewGroup container = null;
ImageView pgrImage;
View viewPgaer = inflates.inflate(R.layout.row_pager, null);
pgrImage = (ImageView)viewPgaer
.findViewById(R.id.pagerImage);
pgrImage.setImageResource(arrayOfPager.get(position).getPagerImg());
((ViewPager) collection).addView(viewPgaer, 0);
return viewPgaer;
}
public void destroyItem(View collection, int position, Object view) {
((ViewPager) collection).removeView((View) view);
}
public boolean isViewFromObject(View view, Object object) {
return view == (object);
}
public void finishUpdate(View arg0) {
}
@Override
public void restoreState(Parcelable arg0, ClassLoader arg1) {
}
@Override
public Parcelable saveState() {
return null;
}
@Override
public void startUpdate(View arg0) {
}
}
XML Design For View Pager:
<android.support.v4.view.ViewPager
android:id="@+id/pagesCustmLayoutMAIN"
android:layout_width="fill_parent"
android:layout_height="160dp" />
ViewPager pager;
private ArrayList<ModelClassPager> arrayOfPager;
pager1 = (ViewPager)findViewById(R.id.pager);
arrayOfPager = new ArrayList<ModelClass>();
arrayOfPager.add(new ModelClass(R.drawable.first));
arrayOfPager.add(new ModelClass(R.drawable.second));
arrayOfPager.add(new ModelClass(R.drawable.third));
arrayOfPager.add(new ModelClass(R.drawable.four));
PagerAdapter pagerAdapter = new PagerAdapter (MainActivity.this,arrayOfPager);
pagerAdapter .setAdapter(pagerAdapter);
Custom Adapter for View Pager:
PagerAdapter extends PagerAdapter {
LayoutInflater inflates;
ArrayList<ModelClass> arrayOfPager;
Context context;
public PagerAdapter (Context context,
ArrayList<ModelClass> arrayOfPager_) {
this.context = context;
this.arrayOfPager = arrayOfPager_;
inflates = (LayoutInflater) context
.getSystemService(Context.LAYOUT_INFLATER_SERVICE);
}
@Override
public int getCount() {
return arrayOfPager.size();
}
public Object instantiateItem(View collection, int position) {
ViewGroup container = null;
ImageView pgrImage;
View viewPgaer = inflates.inflate(R.layout.row_pager, null);
pgrImage = (ImageView)viewPgaer
.findViewById(R.id.pagerImage);
pgrImage.setImageResource(arrayOfPager.get(position).getPagerImg());
((ViewPager) collection).addView(viewPgaer, 0);
return viewPgaer;
}
public void destroyItem(View collection, int position, Object view) {
((ViewPager) collection).removeView((View) view);
}
public boolean isViewFromObject(View view, Object object) {
return view == (object);
}
public void finishUpdate(View arg0) {
}
@Override
public void restoreState(Parcelable arg0, ClassLoader arg1) {
}
@Override
public Parcelable saveState() {
return null;
}
@Override
public void startUpdate(View arg0) {
}
}
Model Class (Gettor Settor Class):
public class ModelClassPager {
int pagerImg = 0;
public int getPagerImg() {
return pagerImg;
}
public void setPagerImg(int pagerImg) {
this.pagerImg = pagerImg;
}
public ModelClassPager( int pagerImg_) {
// TODO Auto-generated constructor stub
pagerImg = pagerImg_;
}
}
XML Design For View Pager:
android:id="@+id/pagesCustmLayoutMAIN"
android:layout_width="fill_parent"
android:layout_height="160dp" />
Sunday, November 22, 2015
Custom Navigation Drawer in Android
Create Navigation Drawer in android using fragment.
DrawerLayout drawerLayout;
drawerLayout = (DrawerLayout) findViewById(R.id.drawer_layout);
// On drawerLayout click open and close
public void openDrawable() {
// TODO Auto-generated method stub
optionMenuStr="open";
//menuImage.setBackgroundResource(R.drawable.backk);
drawerLayout.openDrawer(Gravity.LEFT);
}
public void closeDrawable() {
// TODO Auto-generated method stub
optionMenuStr="close";
menuImage.setBackgroundResource(R.drawable.menu);
drawerLayout.closeDrawers();
}
<RelativeLayout xmlns:android="http://schemas.android.com/apk/res/android"
xmlns:ads="http://schemas.android.com/apk/res-auto"
android:layout_width="fill_parent"
android:layout_height="fill_parent" >
<android.support.v4.widget.DrawerLayout
android:id="@+id/drawer_layout"
android:layout_width="fill_parent"
android:layout_height="match_parent" >
<FrameLayout
android:id="@+id/content_frame_Home"
android:layout_width="match_parent"
android:layout_height="match_parent" />
<RelativeLayout
android:id="@+id/left_relative"
android:layout_width="300dp"
android:layout_height="wrap_content"
android:layout_gravity="start" >
<include layout="@layout/slider" />
</RelativeLayout>
</android.support.v4.widget.DrawerLayout>
</RelativeLayout>
 |
| Navigation Drawer |
drawerLayout = (DrawerLayout) findViewById(R.id.drawer_layout);
// On drawerLayout click open and close
public void openDrawable() {
// TODO Auto-generated method stub
optionMenuStr="open";
//menuImage.setBackgroundResource(R.drawable.backk);
drawerLayout.openDrawer(Gravity.LEFT);
}
public void closeDrawable() {
// TODO Auto-generated method stub
optionMenuStr="close";
menuImage.setBackgroundResource(R.drawable.menu);
drawerLayout.closeDrawers();
}
Disable Swipe Open Navigation Drawer Android:
Disable Swipe Open Navigation Drawer, sometime we use fragment and BaseActivity is same and fragment are different then in other fragments we need to stop swipe open Drawer then use this code.
drawerLayout.setDrawerLockMode(DrawerLayout.LOCK_MODE_LOCKED_CLOSED);
Disable to Able Swipe Open Navigation Drawer Android:
if one you have disable swipe open then again it need to open else it not working.
drawerLayout.setDrawerLockMode(DrawerLayout.LOCK_MODE_UNLOCKED);
XML Design.
<?xml version="1.0" encoding="utf-8"?><RelativeLayout xmlns:android="http://schemas.android.com/apk/res/android"
xmlns:ads="http://schemas.android.com/apk/res-auto"
android:layout_width="fill_parent"
android:layout_height="fill_parent" >
<android.support.v4.widget.DrawerLayout
android:id="@+id/drawer_layout"
android:layout_width="fill_parent"
android:layout_height="match_parent" >
<FrameLayout
android:id="@+id/content_frame_Home"
android:layout_width="match_parent"
android:layout_height="match_parent" />
<RelativeLayout
android:id="@+id/left_relative"
android:layout_width="300dp"
android:layout_height="wrap_content"
android:layout_gravity="start" >
<include layout="@layout/slider" />
</RelativeLayout>
</android.support.v4.widget.DrawerLayout>
</RelativeLayout>
Saturday, November 21, 2015
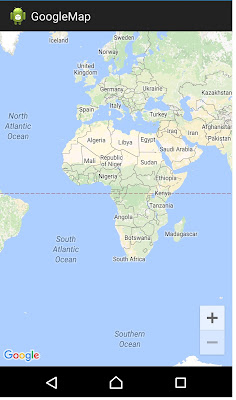
Show Google Map V2 in FragmentActivity Android.
show google map v2 in fragment activity, we need SupportMapFragment for it and fragment in xml file.
private GoogleMap googleMap;
SupportMapFragment supportMapFrag=(SupportMapFragment)getSupportFragmentManager().findFragmentById(R.id.map);
googleMap=supportMapFrag.getMap();
/*set map type*/
googleMap.setMapType(GoogleMap.MAP_TYPE_NORMAL);
 |
| Google Map in Android |
private GoogleMap googleMap;
SupportMapFragment supportMapFrag=(SupportMapFragment)getSupportFragmentManager().findFragmentById(R.id.map);
googleMap=supportMapFrag.getMap();
/*set map type*/
googleMap.setMapType(GoogleMap.MAP_TYPE_NORMAL);
xml layout for map:
<RelativeLayout xmlns:android="http://schemas.android.com/apk/res/android"
xmlns:tools="http://schemas.android.com/tools"
android:layout_width="fill_parent"
android:layout_height="fill_parent">
<fragment
android:id="@+id/map"
android:layout_width="fill_parent"
android:layout_height="fill_parent"
class="com.google.android.gms.maps.SupportMapFragment" />
</RelativeLayout>
add Google Play Service library and gilve all permission in manifest.
<permission
android:name="com.googlemap.permission.MAPS_RECEIVE"
android:protectionLevel="signature" />
<uses-permission android:name="YOUR_PACKAGE_NAME.MAPS_RECEIVE" />
<uses-permission android:name="android.permission.INTERNET" />
<uses-permission android:name="android.permission.WRITE_EXTERNAL_STORAGE" />
<uses-permission android:name="com.google.android.providers.gsf.permission.READ_GSERVICES" />
<uses-permission android:name="android.permission.ACCESS_COARSE_LOCATION" />
<uses-permission android:name="android.permission.ACCESS_FINE_LOCATION" />
<uses-permission android:name="android.permission.ACCESS_NETWORK_STATE" />
<uses-feature
android:glEsVersion="0x00020000"
android:required="true" />
before Application Tag add these.
<meta-data
android:name="com.google.android.gms.version"
android:value="@integer/google_play_services_version" />
<meta-data
android:name="com.google.android.maps.v2.API_KEY"
android:value="YOUR API KEY" />
Thursday, August 20, 2015
Multi Color in Single TextView Android
How To set Multi Color in Single TextView:
programatically we can set multi color text in single TextView, first part of text show different color and other part show different color. dynamically set text on TextView.
TextView textView;
textView.setText(Html.fromHtml("<font color='#4CAF50'> Android</font> <font color='#0091EA'>Developer</font>"));
in above code first part "Android" show green color and "Developer" show blue color. so like that we can set dynamically multi color in single Textview.
Tuesday, August 18, 2015
Alert Dialog in Android
show alert dialog in Android for validation or other purpose, show alert dialog with message and when click on Ok then Dismiss.
it pop up on screen and display message.
Context context;
String message;
AlertDialog alert = null;
AlertDialog.Builder builder = new AlertDialog.Builder(context);
builder.setMessage(message)
.setCancelable(false)
.setPositiveButton("OK", new DialogInterface.OnClickListener() {
public void onClick(DialogInterface dialog, int id) {
alert.dismiss();
}
});
alert = builder.create();
alert.show();
}
Wednesday, August 12, 2015
Show Image Using Picasso in Android
Picasso is powerful Image Loading Library in Android, it caching image and manage memory automatically and large image easily handle in Android.
Working with Images In Android:
In Android handle many Image and manage them is complex, some time "Out Of Memory Error Occur" due to large size Images and we need to recycle and free memory after image load.
Monday, August 10, 2015
Get Gmail Address Of User In Android Programatically
In Android get user gmail address programatically in android using AccountManager.
try {
AccountManager accountManager = AccountManager.get(context);
Account[] accountsEmail = accountManager.getAccountsByType("com.google");
Account email = accountsEmail[0];
return email.name;
} catch (Exception e) {
// TODO Auto-generated catch block
e.printStackTrace();
}
try {
AccountManager accountManager = AccountManager.get(context);
Account[] accountsEmail = accountManager.getAccountsByType("com.google");
Account email = accountsEmail[0];
return email.name;
} catch (Exception e) {
// TODO Auto-generated catch block
e.printStackTrace();
}
Friday, August 7, 2015
Search in Listview Android
Search inside listview using addTextChangedListener , in listview when EditText we search then below list show related search list data.
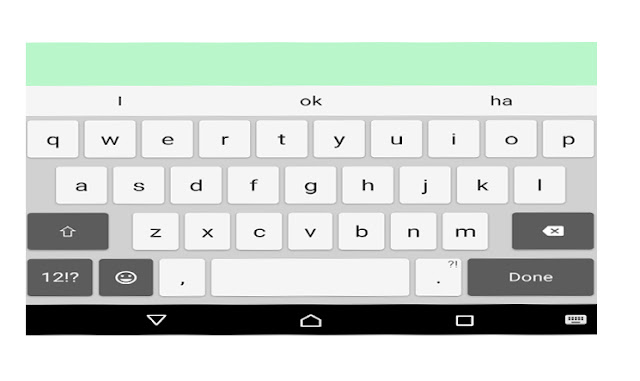
Hide Keyboard in Android
Hide keyboard in android on button click or layout click some time we notice that after enter data in edittext when click button then still show keyboard on eittext, we need to hide keyboard on button click.
some time we switch one activity to another activity then if keyboard open in first activity then it also show in second activity.
some time we switch one activity to another activity then if keyboard open in first activity then it also show in second activity.
 |
| Hide keyboard android |
Thursday, August 6, 2015
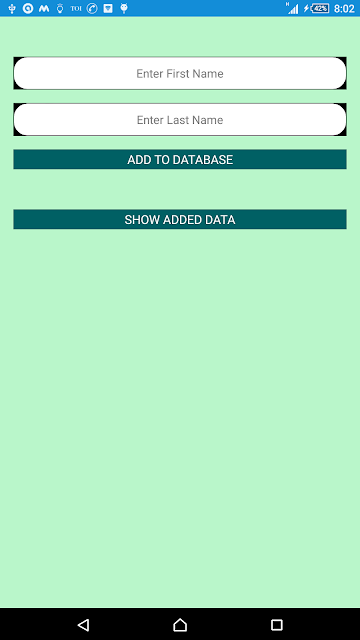
Data store and retrieve in android using sqlite database
Store Data in SQLite Database Android:
many ways to storage data in android like Share Preference and other but store data using SQLite is parmanent and can be in many format. In Share Preference save data in key-value pair.
For SQLite we extend SQLiteOpenHelper and @Override write query and save data.
 |
| Add Data in Android Using SQLite Database |
Thursday, June 18, 2015
Passing Data Between Activities in Android
passing data from one activity to another activity in android using intent.
Suppose two Activity : FirstActivity and SecondActivity. if we want to send data from FirstActivity to SecondActivity then we move from another activity using Intent
We Send data in key-value form.
Suppose two Activity : FirstActivity and SecondActivity. if we want to send data from FirstActivity to SecondActivity then we move from another activity using Intent
We Send data in key-value form.
Convert timestamp to date and time in android
Here Timestamp means UNIX timestamp,convert to date and time in android. suppose timestamp is 1434624342( http://www.currenttimestamp.com/) and show into DD-MM-YYYY and HH:MM format.
long time=1434624342;
Calendar cal = Calendar.getInstance(Locale.ENGLISH);
cal.setTimeInMillis(time);
String date = DateFormat.format("dd-MM-yyyy hh:mma", cal).toString();
Sunday, February 22, 2015
Load URL in WebView Android
Open URL in WebView:
In android open website by using WebView. WebView use for display website content in android like as browser.
What is WebView:
WebView use for open website in android like browser. WebView display all website data in andriod.
Like this URL open in WebView http://invokecode.blogspot.in/
Like this URL open in WebView http://invokecode.blogspot.in/
 |
| WebView in Android |
Labels:
Load URL in WebView
,
Open URL in webview
,
WebView in android
Tuesday, February 17, 2015
Create Custom ListView in Androd
What is Custom ListView:
custom list view means custom Layouts and show custom Item in listview. in simple listview use only text or image show in list using ArrayAdapter but in custom listview we use CustomAdapter.
custom listview may be many image or text. |
| Custom ListView in Android |
Why Use Custom Listview:
as we discuss simple listview contain only simple layout so we need custom layout for custom listview. custom listview contain images and text and many more.
Labels:
Custom Adapter
,
Custom listView
,
Listview in Android
Friday, January 9, 2015
AsyncTask in Android
AsyncTask in Android:
 |
| AsyncTask in Android |
Asynctask in android use for network operation like upload data and get data from server means "Network Related Task" If without use of AsyncTask we do network related task then "RunOnUIException " error Occur.
Create AsyncTask by extend Async
AsyncTask method onPreExecute, doInBackground, onProgressUpdate and onPostExecute and for acess UI mean without network related task like set value in textbox or show progress dialog etc. onPreExecute and onPostExecute Only for UI. and for "Network Related Task" use doInBackground. method.
for short operation we use AsyncTask and if need large data then use Executor, ThreadPoolExecutor and FutureTask. easy manage UI and Background related work in AsyncTask but In case of Thread for UI we need runOnUiThread method or handler.
@Override
Create AsyncTask by extend Async
AsyncTask method onPreExecute, doInBackground, onProgressUpdate and onPostExecute and for acess UI mean without network related task like set value in textbox or show progress dialog etc. onPreExecute and onPostExecute Only for UI. and for "Network Related Task" use doInBackground. method.
for short operation we use AsyncTask and if need large data then use Executor, ThreadPoolExecutor and FutureTask. easy manage UI and Background related work in AsyncTask but In case of Thread for UI we need runOnUiThread method or handler.
Create AsyncTask:
class AstncTask extends AsyncTask {
@Override
protected void onPreExecute() {
// TODO Auto-generated method stub
super.onPreExecute();
// For UI
}
@Override
protected String doInBackground(String... params) {
// TODO Auto-generated method stub
//"Network Related Task"
}
@Override
protected void onPostExecute(String result) {
super.onPostExecute(result);
//after doInBackground it call
// UI related work
}
}
Call AsyncTask
new AsyncTask().execute();
visit: http://invokecode.com/ for More Tutorials
if any query related this tutorial then please comments !!
Thank You !!
Saturday, January 3, 2015
Progress Dialog in Android
show progress dialog in android:
ProgressDialog pDialog; //initialize
pDialog = new ProgressDialog(context); // pass context or activity.this
pDialog.setMessage(“Please wait…”);// set Message
pDialog.show(); // showing
pDialog.setMessage(“Please wait…”);// set Message
pDialog.show(); // showing
pDialog.dismiss(); // dismiss
Email Validation in Android:
Email Validation in Android:
Email validation in android, simply we match Pattern like name@gmail.com format…
String.matches if match then email format is valid else not valid format..
for email Pattern:
String pattern= “[a-zA-Z0-9._-]+@[a-z]+\\.+[a-z]+”;
if (ourEmail.matches(pattern)) {
Email valid format
}
else{
“invalid email format!!
}
Email valid format
}
else{
“invalid email format!!
}
Custom Dialog in Android
Show custom dialog in android:
 |
| Custom Dialog in Android |
Dialog dialog=new Dialog(MainActivity.this);
// inflate layout here
dialog.setContentView(R.layout.custon_dialog_layouts);
dialog.setTitle(“Custom Dialog”);
dialog.setTitle(“Custom Dialog”);
// define custom dialog button , edittext etc. here and their click
like example
Button button=(Button) dialog.findViewById(R.id.cancelDialog);
// Button = dialog nanem.related find id//
// dialog.dismiss for dismiss dialog
dialog.show();
Button button=(Button) dialog.findViewById(R.id.cancelDialog);
// Button = dialog nanem.related find id//
// dialog.dismiss for dismiss dialog
dialog.show();
Note:if any issue to implement then comment.
Thank You !!
Subscribe to:
Comments
(
Atom
)


